

SEE HOW SIMPLE IT IS
Watch the 60-Second Installation
See how the frame connects, how it is secured inside the window reveal and how the assembled panels lift into place.
A Few Things You'll Need
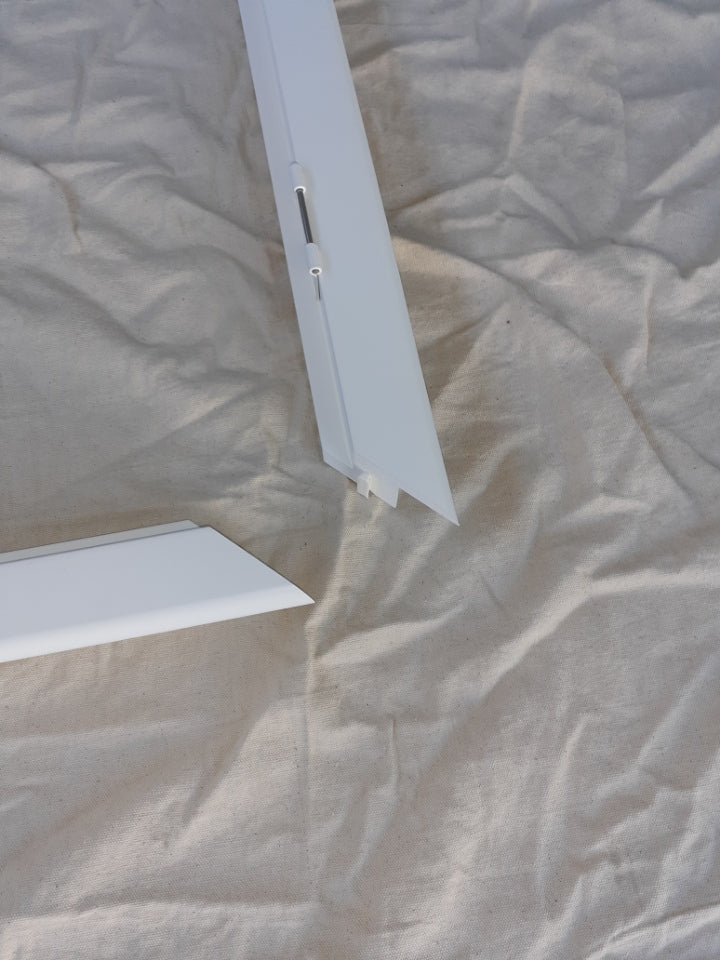
Step 1: Assemble the Frame
NOTE: If your shutter is a single-panel unit, the frame may arrive pre-assembled. Remove the shutter panel from the frame before installation, then proceed to Step 4.
- Carefully unpack your shutter and place the components on a clean, flat surface. Avoid cutting directly against the frame when opening the packaging.
- Locate the four labelled frame sections: Top, Bottom, Left and Right.
- Arrange the four sections into a rectangle.
- Connect each corner using the supplied corner connectors.
- Press each corner together firmly until secure.

Steps 2–3: Install T-Posts & Packers (If Required)
STEP 2 - INSTALL T-POSTS
Some shutter configurations include one or more T-posts, which act as vertical dividers between the shutter panels.
Position the T-post
- If your window has a vertical divider (mullion), position the T-post so it aligns with it.
- Before securing it, check that the T-post is the correct way up and sitting straight.
- Secure the T-post in position using the supplied screws.
STEP 3 - ADD PACKERS IF REQUIRED
Packers are only needed where there are small gaps or where the frame needs minor adjustment to sit straight and level.
- Position packers behind the frame where additional support or adjustment is required.
- Use only as many as needed to achieve an even, secure fit.
- Once positioned correctly, continue to Step 4.
Important: Not every shutter requires a T-post or packers. If neither applies to your shutter, simply continue to Step 4.

Step 4: Position & Secure the Frame
POSITION THE FRAME
- Lift the assembled frame and place it carefully inside the window reveal.
- Centre the frame and check that it is sitting straight and square.
- If there is a small amount of movement, gently lift the frame so it sits snugly against the top of the reveal.
LIGHTLY SECURE THE FRAME
- Using the pre-drilled fixing points, insert the fixing screws through the left and right sides of the frame.
Note: If your frame does not have pre-drilled fixing points, simply screw directly through the raised light-block section of the frame. No pre-drilling is required.
- At this stage, do not fully tighten the screws. Leave them slightly loose so you can make small adjustments after the shutter panels are fitted.
- Check that the frame remains straight and level before moving on.
Important: Don't install or fully tighten all fixing screws yet. You'll complete the final fixing once the panels have been fitted and checked for alignment.

Step 5: Test Fit and Install Side Panels
CHECK YOUR PANELS
Panels are numbered from left to right, starting with 1 (some may be labelled A). Always install your panels from left to right.
Important: Before installing, check that each panel is the correct way up - the louvres should close upwards.
INSTALL THE PANELS
- Carefully unpack each panel and locate the supplied hinge pins.
- Lift the panel using the side stiles or midrail (if fitted). Avoid lifting the shutter by the louvres.
- Position the first panel inside the frame and align the panel hinges with the corresponding frame hinges.
- Insert the hinge pins to secure the panel.
- Repeat for the remaining panels, working from left to right.
- Once all panels are installed, gently open and close them to check the fit.
HINGES NOT QUITE LINING UP?
Don't force the hinge pins into position. Small adjustments to the frame may be needed - this is why we left the frame screws slightly loose in Step 4. Continue to Step 6 to make your final alignment adjustments.

Step 6: Check the Fit & Make Final Adjustments
CHECK THE FIT
With all panels installed, step back and check the overall fit.
- Check that the panels sit evenly within the frame.
- Open and close each panel to make sure it moves freely.
- Check that the gaps around and between the panels look even.
- Use a spirit level to confirm the frame is sitting straight and level.
MAKE SMALL ADJUSTMENTS IF NEEDED
If the panels aren't sitting evenly, use the slightly loose frame screws from Step 4 to make small adjustments to the frame position.
- Loosen or tighten the side fixing screws as needed until the panels sit evenly and operate smoothly.
- Once you're happy with the alignment, install any remaining fixing screws and tighten the frame securely.
- Recheck that all panels open and close smoothly after the final screws are tightened.
Tip: Small adjustments at this stage are completely normal — take your time and use the panel gaps as a visual guide.
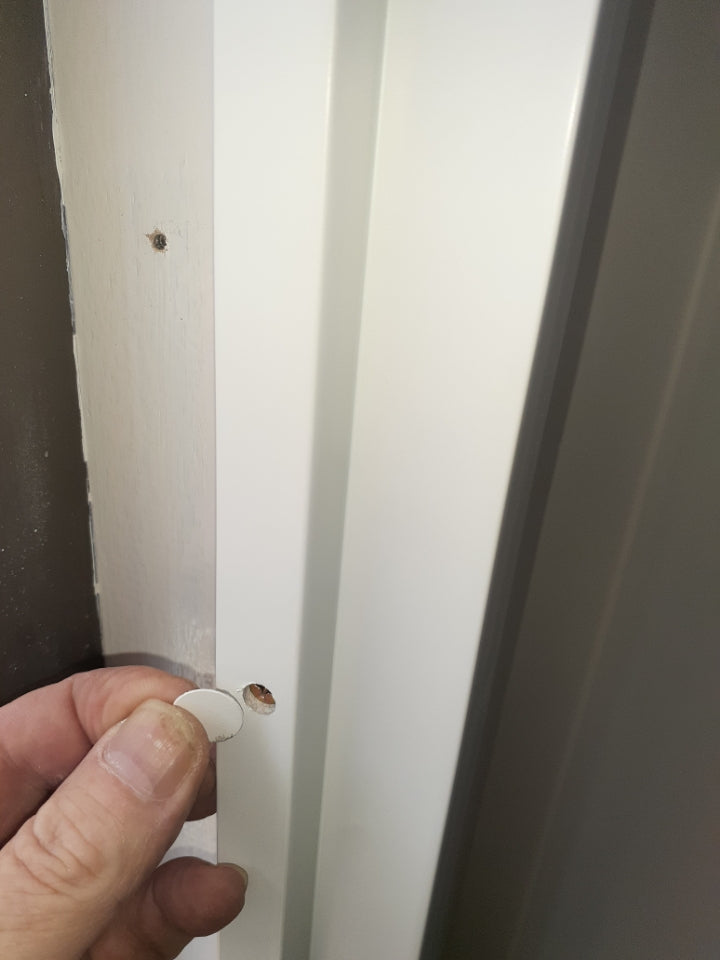
Step 7: Finishing Touches
COVER THE FIXING SCREWS
- Apply the supplied adhesive screw covers (“sticky dots”) over any visible fixing screw heads.
- Press each one firmly into place for a clean, finished appearance.
SECURE THE HINGES
- Locate the white-painted hinge screws supplied with your shutter.
- Insert the screws into the designated fixing holes in each hinge and tighten securely.
FINAL CHECK
- Open and close each shutter panel to make sure everything operates smoothly.
- Tilt the louvres through their full range and check that they move freely.
- Give the frame and panels a quick wipe down to remove any dust or marks from installation.
That's it - your plantation shutters are installed and ready to enjoy.